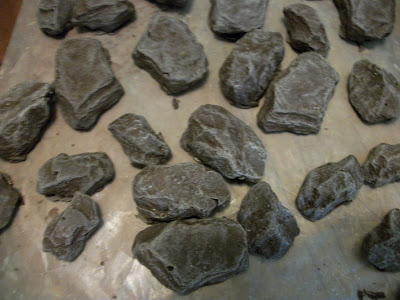
When I made the wolf cake, I also needed some cupcakes to go with it. I made mossy rock cupcakes to match the wolf cake. In this post, I'll show you how I made the chocolate rocks.
First off, find yourself some interesting rocks out in the garden, that are a good size to sit on your cupcakes. Also, find a good size container for your rocks. They'll need about 1/4" of space between each one. Wash the rocks very, very well, and dry them off with paper towels. Grease your container and rocks with shortening. If your rocks aren't completely flat on the bottom (what rocks are, really?) fill in the gaps with shortening and place them in the bottom of your container. One you've got all your rocks positioned in your container, it's time to make the mold material.
Now, if you've ever made a mold before, you'll know that all the materials you can get for it, especially food safe materials like ComposiMold or silicone, can be very expensive. But it doesn't have to be a spendy project. Here is a recipe for an inexpensive, reusable, food safe mold...
Gelatine and light corn syrup (liquid glucose if you're in EU), with a little water. Yep, that's all. The amounts are roughly equal parts gelatine and corn syrup with just enough water to hydrate the gelatine. The amounts don't have to be exact, I usually just eyeball it.
Put your gelatine in a microwave safe bowl. Add enough water to the bowl to hydrate the gelatine, that'll be about 1/3 cup of water to each cup of gelatine. Slowly work the gelatine into the water. If necessary, you can add more water. Let the gelatine absorb the water for a few minutes.
Pop the mixture into the microwave for 10 seconds and stir. If the gelatine hasn't melted at all, microwave it for another 10 seconds. It should look relaxed, if not melty.
At this point, add the corn syrup. Heat and stir gently at 10 second intervals until the gelatine is completely melted, it will be very sticky.
You can add white (and color) food coloring to it if desired. I find it makes it easier to see imperfections in the mold if it's opaque. Plus, it doesn't hurt anything for it to look prettier. !)
If it has started to solidify while you were adding the food coloring, just nuke it for an additional 10 seconds.
While the mixture is hot, pour it over your rocks in the container. Slam it on the table a few times to release any air bubbles that might be trapped in the mold. Then pop it in the freezer for about 5 minutes or until the mold is completely set.
The bowl will look like a terrible, sticky mess that will never come clean. Just let the material set up completely, and you will be able to pull it off the bowl very easily.
If you mess up your first mold, don't sweat it. Did you notice I called the material "reusable"? Well, if the mold doesn't come out. You can remelt it in the microwave and try it again. In fact, the container I chose at first was too big for the amount of material I made, so I clipped out the two rock molds that came out, and melted the rest. I found a smaller container and redid the mold.

Once your mold is set, turn it out onto the table, pop the rocks out, and wash the mold in cool water. Dry the mold completely.
Melt your chocolate, and pour it into the molds! I set mine up in the freezer, because I was under some time pressure.
To make the chocolate rocks look a little more natural, I used a large paintbrush and dusted them with white petal dust. Drag the brush across the angles to accentuate the details.
Your rocks are done!
Store your molds in the refrigerator or freezer to prolong their life.
Happy Caking!


This comment has been removed by the author.
ReplyDeleteThis comment has been removed by the author.
ReplyDelete